
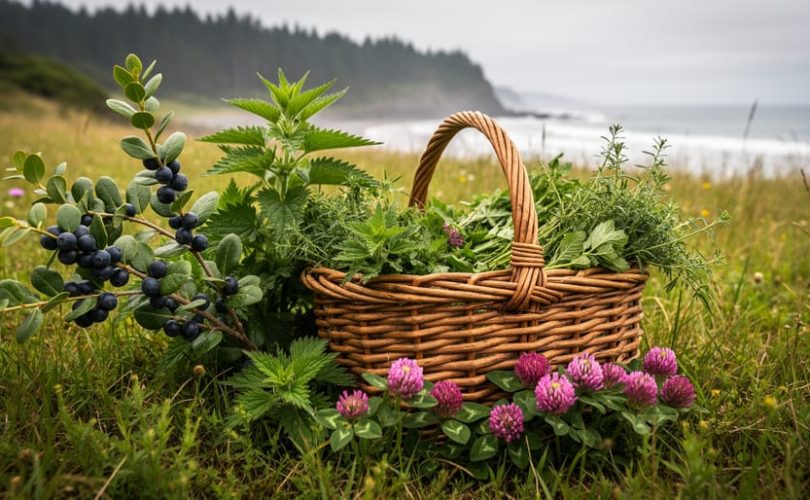
Oregon’s wild landscapes hold a living pharmacy of medicinal plants, and harvesting them sustainably requires knowledge of proper identification, legal regulations, and ethical collection practices that protect these ecosystems for future generations. Wild herb harvesting in Oregon combines ancient wisdom with modern conservation science, allowing you to gather healing plants like Oregon grape, red clover, and wild nettle while preserving the delicate balance of forests, meadows, and coastal areas that sustain them.
The practice of gathering wild medicinal herbs connects us to thousands of years of human relationship with plants. Indigenous communities of the Pacific Northwest have cultivated this knowledge across generations, developing harvesting methods that strengthen rather than deplete plant communities. Today’s wildcrafters inherit this responsibility, learning to recognize harvest-ready plants in their native habitats, distinguish them from toxic look-alikes, and collect only what they need while leaving robust populations behind.
Oregon’s diverse ecosystems present both opportunity and challenge. The same bioregional variety that produces exceptional medicinal plants demands careful attention to timing, habitat, and technique. Harvesting roots in spring requires different skills than gathering aerial parts in summer. Public lands carry specific permit requirements. Some plants regenerate quickly from careful pruning, while others need years to recover from disturbance.
This guide walks you through the complete process, from securing proper permissions and assembling your wildcrafting kit to identifying prime harvesting windows and processing your herbs for maximum potency. Whether you’re gathering ingredients for personal remedies or deepening your connection to the land’s healing traditions, mastering these practices ensures your impact remains regenerative rather than extractive.
Understanding Oregon’s Wild Herb Landscape
Common Medicinal Herbs Found in Oregon
Oregon’s wild landscape offers a generous pharmacy for those who know where to look. Six medicinal herbs stand out as both abundant and beginner-friendly, each with distinct features that make positive identification manageable even for new wildcrafters.
- Oregon grape (Mahonia aquifolium), evergreen shrub with holly-like leaves, bright yellow flowers in spring, and blue-purple berries; the yellow inner bark of roots is the medicinal part
- Red clover (Trifolium pratense), pink to magenta globe-shaped flower heads on stems with three-part leaves often marked with a pale chevron
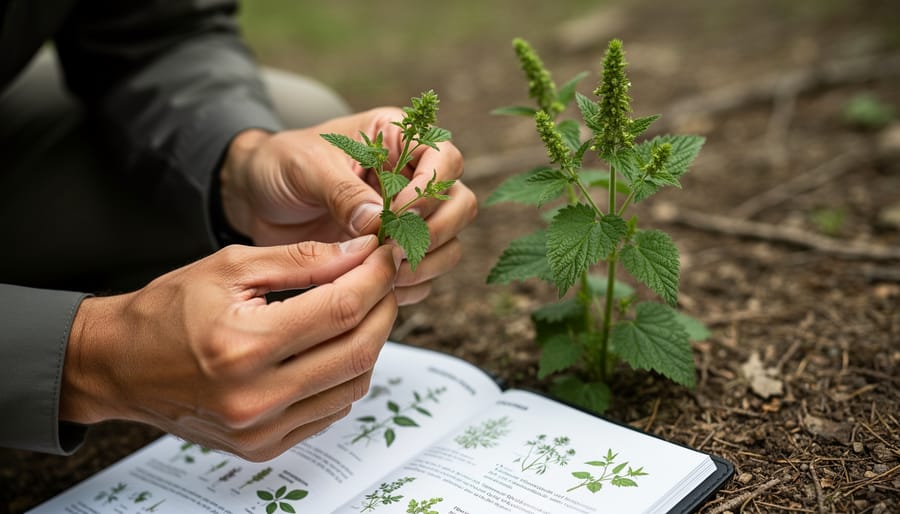
- Nettles (Urtica dioica), upright plants with opposite, toothed leaves covered in stinging hairs; young spring tops are harvested before flowering
- St. John’s wort (Hypericum perforatum), yellow five-petaled flowers that release red oil when crushed, leaves appear perforated when held to light
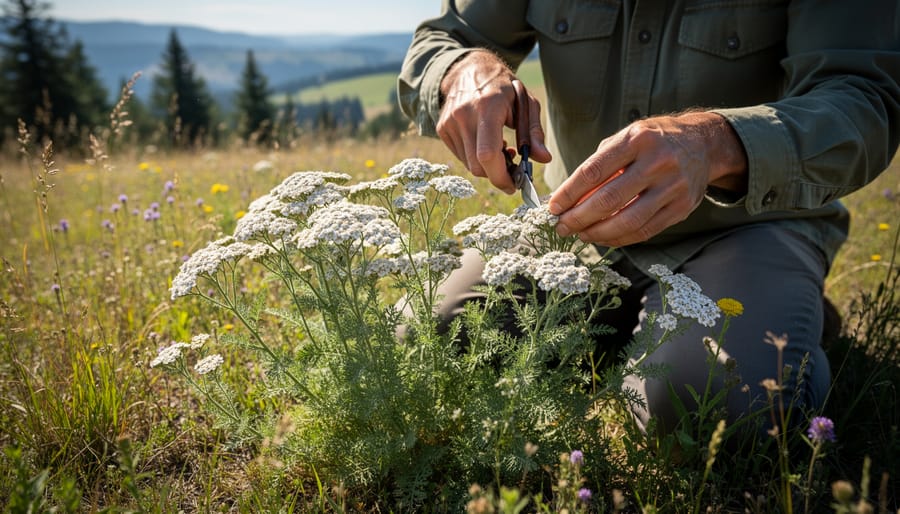
- Yarrow (Achillea millefolium), flat-topped white or pink flower clusters, finely divided feathery leaves that smell faintly aromatic when crushed
- Wild rose (Rosa species), thorny shrubs with five-petaled pink flowers and bright red hips that develop after bloom
Oregon grape roots have been used traditionally for digestive support and skin conditions, drawing on indigenous perspectives on plants that recognize this native shrub’s powerful antimicrobial properties. Red clover flowers make a gentle blood-cleansing tea, while spring nettles provide iron-rich nutrition. St. John’s wort flowers harvested at peak bloom yield potent oil for nerve pain, and yarrow’s entire flowering top addresses everything from wounds to fevers. Wild rose hips, gathered after frost, contain concentrated vitamin C.
Learning these six creates a foundation. Each grows in different habitats, Oregon grape in forest understory, red clover in meadows, nettles near water, so mastering them means understanding multiple ecosystems simultaneously.
Seasonal Harvesting Windows
Understanding when to harvest is as important as knowing what to harvest. In Oregon’s climate, plant energy shifts throughout the growing season, concentrating medicinal compounds in different parts at different times.
Spring (March-May) is prime time for harvesting young leaves and shoots. Plants channel energy upward as they break dormancy, making this when nettles, cleavers, and dandelion greens reach peak nutrient density. Early spring also offers the last window for root harvesting before plants redirect stored compounds to new growth.
Summer (June-August) brings flowers to their aromatic peak. Harvest St. John’s wort blossoms in full sun during late June, and yarrow flowers as they first open in July. Leaves harvested just before flowering contain concentrated volatile oils, this applies to Oregon grape leaves and self-heal.
Late summer into fall (August-October) is seed collection season. Allow plants to fully mature; seeds should be brown and starting to dry naturally on the stem. Red clover and wild rose hips develop their medicinal properties as they ripen through September.
Fall and winter (October-March) are for roots. After plants die back, energy returns underground. Oregon grape root, dandelion taproot, and burdock root reach maximum potency after the first frost, when above-ground growth has stopped and the plant enters dormancy.
Essential Tools and Materials for Wildcrafting
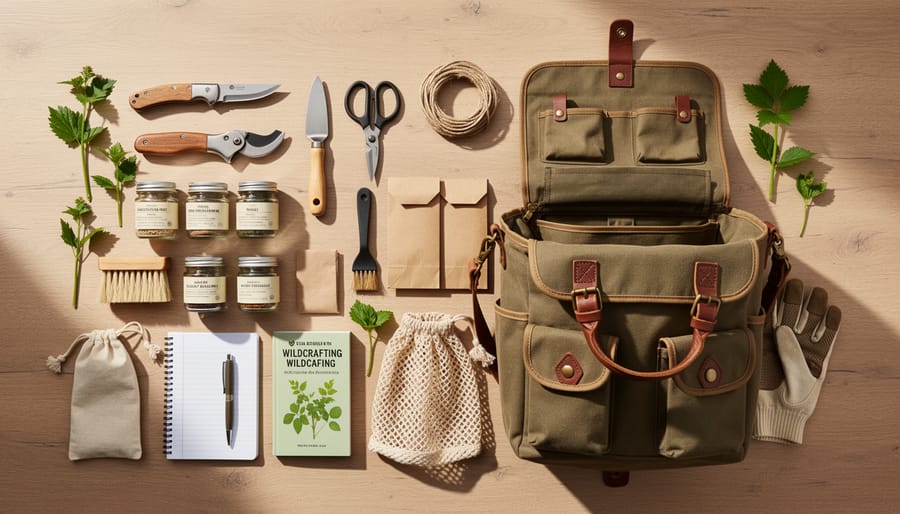
Before you head into Oregon’s wild spaces, assembling the right gear sets you up for responsible, effective harvesting. Your toolkit doesn’t need to be expensive or extensive, but each item serves a specific purpose in protecting both the plants you’re harvesting and yourself.
Start with field guides specific to Pacific Northwest flora, ideally at least two from different publishers to cross-reference identification features. A hand lens or jeweler’s loupe (10x magnification) helps you examine key botanical details like leaf hairs, flower parts, and stem characteristics that separate medicinal plants from toxic look-alikes. Bring a smartphone or camera to document plants in situ, capturing multiple angles before you harvest. This photographic record becomes invaluable when you’re verifying identification later or consulting with more experienced wildcrafters.
For cutting and digging, sharp tools prevent unnecessary plant damage. Pruning shears or scissors make clean cuts on aerial parts, while a sturdy digging knife or small trowel works for roots. Dull blades crush plant tissue and create entry points for disease, so maintain your edges. A small folding saw handles woody stems and bark, though you’ll rarely need to harvest bark as a beginning wildcrafter.
Collection containers matter more than you might think. Breathable cotton or mesh bags prevent moisture buildup that degrades fresh herbs within hours. Avoid plastic bags unless you’re heading straight home, they trap humidity and cook your harvest in direct sun. Separate bags for different species prevent cross-contamination and make sorting easier later. Small paper bags work well for seeds and flowers. A rigid basket protects delicate aerial parts from crushing.
Documentation materials complete your essential kit:
- Waterproof notebook and pencil for recording GPS coordinates, habitat notes, and harvest dates
- Field maps or GPS device to mark productive locations and track harvested areas
- Plant tags or labels to identify each bag’s contents immediately after harvest
- Measuring tape to assess population size and calculate sustainable harvest amounts
A small first aid kit addresses the inevitable scratches and stings, while sunscreen, water, and weather-appropriate clothing keep you functional during longer foraging sessions. Some wildcrafters carry offering materials, tobacco, cornmeal, or another token, as part of their harvest ritual, honoring indigenous traditions of reciprocity with plant communities.
As your practice deepens, you might add specialized tools like a plant press for creating reference specimens or a refractometer for assessing essential oil content. Start simple, though. The most critical tool is your attention to detail and willingness to leave plants behind when you’re uncertain about identification or population health.
Safety and Legal Considerations
Navigating Public and Private Land Regulations
Oregon’s public lands offer abundant wildcrafting opportunities, but each land type comes with distinct rules you need to understand before you harvest.
National Forests cover roughly 15.6 million acres in Oregon and generally allow personal-use herb harvesting without a permit if you collect less than one gallon of plant material per day. You’ll need a free-use permit (available at ranger stations) for larger quantities, and commercial harvesting requires a special forest products permit with associated fees. Harvest is prohibited in designated wilderness areas, research natural areas, and botanical special interest areas.
Bureau of Land Management (BLM) lands follow similar guidelines. Personal-use gathering of up to two gallons per person per day is typically allowed without a permit, but commercial collection requires advance permission and fee payment. Check with the specific BLM district office, as regulations vary by location.
State parks in Oregon prohibit all plant harvesting except for berries in designated areas. This is a firm rule often overlooked by new wildcrafters.
Private land requires explicit written permission from the landowner before any harvesting occurs. Trespassing laws apply fully.
To obtain commercial permits, contact the relevant land management agency at least 30 days before your planned harvest. You’ll need to specify the species, quantity, and location. Keep permit documentation with you during harvest, as rangers and officers do conduct field checks. Violating these regulations can result in fines exceeding $500 and confiscation of harvested materials.
Avoiding Toxic and Endangered Species
Oregon’s forests hold both healing plants and dangerous look-alikes that demand careful attention. Before you harvest any wild herb, you must positively identify it and confirm it’s neither protected nor poisonous.
Protected Species to Never Touch
Oregon lists several medicinal plants as threatened or endangered, including Peck’s milkvetch, Willamette daisy, and certain native gentians. The Oregon Department of Agriculture maintains the current list of protected plants at their rare plant database. Harvesting these species carries legal penalties and harms vulnerable populations.
Common Toxic Plants That Mimic Medicinals
Water hemlock resembles wild parsley and cow parsnip but contains cicutoxin, one of North America’s deadliest plant compounds. Death camas looks similar to wild onion but lacks the characteristic onion smell. Foxglove’s leaves can be confused with comfrey, both have similar growth patterns and fuzzy textures, yet foxglove contains dangerous cardiac glycosides.
Always verify plants using multiple identification features: leaf arrangement, stem characteristics, scent, habitat, and growth season. When uncertain, consult the Oregon Flora Project or contact your local Native Plant Society chapter before harvesting anything.
Step-by-Step Wild Herb Harvesting Process
Pre-Harvest Preparation and Scouting
Before stepping into the field, successful wildcrafting begins at home. Start by researching potential harvest sites using topographic maps, plant distribution databases like the Oregon Flora Project, and local herbalist networks. Cross-reference your target herbs with their preferred habitats, nettles thrive in moist, disturbed soils near streams, while Oregon grape prefers shaded forest edges.
Check weather forecasts carefully. Plan harvests for dry mornings after the dew has evaporated but before midday heat stresses plants. Avoid collecting within 48 hours of heavy rain, which can introduce mold during drying.
Assemble your kit the night before: sharp pruning shears, breathable collection bags, a field guide, notebook for recording location details, water, and a first-aid kit.
When scouting a location, look for robust plant populations showing no signs of disease or insect damage. Avoid areas within 100 feet of roads where exhaust settles on leaves, agricultural fields with potential pesticide drift, or dog-walking trails. Healthy harvest sites display vigorous growth, diverse surrounding vegetation, and no evidence of recent disturbance. Document the site’s coordinates and phenological stage for future reference.
Applying the Honorable Harvest Principles
Before you take your first cutting, pause. The Honorable Harvest framework, rooted in ancient philosophies and carried forward in modern ethical foraging transforms wildcrafting from extraction into relationship.
Start by asking permission. This isn’t metaphorical. Kneel beside the plant, observe it closely, and state your intention aloud or silently. If the plant looks stressed, sparse, or the area feels wrong, move on. This practice tunes your awareness to subtle signs you’d otherwise miss.
Take only what you genuinely need. Calculate your actual requirements before you harvest, not after. If you’re making tea for personal use, a handful of leaves suffices. Commercial quantities require permits and different ethics.
Never harvest more than 10-20% of any plant population at a site. Count the individual plants within view. If you see twelve yarrow stalks, take two at most. This threshold allows the population to regenerate fully. For roots, the limit is stricter: 5-10% maximum, since root harvest kills the plant.
Leave the healthiest, most vigorous specimens untouched. They’re the seed producers, the genetic strength of the next generation. Harvest from average plants instead. Scatter seeds as you work or gently press dropped berries into the soil.
These aren’t rules imposed from outside. They’re observations about what actually works, tested across generations, ensuring the herbs you need today will be there for your grandchildren.
Proper Harvesting Techniques by Plant Part
Different plant parts require distinct harvesting techniques to ensure the plant survives and your harvest maintains its medicinal potency.
Leaves: Harvest in the morning after dew has dried but before midday heat. Pinch or cut individual leaves from the middle to upper part of the stem, never taking more than a few from any single plant. For leafy herbs like nettles, cut the top third of the stem with sharp scissors, leaving at least two nodes so the plant can regenerate. Yellowed or diseased leaves should be left on the plant.
Flowers: Collect when blooms are fully open but not yet fading, typically mid-morning. Use fingertips to snap flower heads cleanly at the stem junction. For St. John’s wort, harvest the flowering tops including a few inches of stem. Handle gently to avoid bruising delicate petals, which can trigger decomposition and reduce medicinal compounds.
Seeds: Wait until pods or seed heads turn brown and dry but before they naturally disperse. Cup your hand beneath the seed head and gently shake or tap to collect. For plants like yarrow, this may mean multiple trips as seeds ripen unevenly.
Bark: Only harvest from branches already pruned or trees scheduled for removal. Never girdle a living tree. Make shallow, vertical cuts that remove just the outer bark layer.
Roots: Dig during dormancy (late fall or early spring) when aerial parts have died back and medicinal constituents concentrate below ground. Use a digging fork to loosen soil in a wide circle around the plant, then lift carefully to preserve the root system. For sustainable wildcrafting take only one tap root and replant smaller roots or root divisions immediately.
Field Processing and Initial Handling
Once you’ve harvested your herbs, the clock starts ticking on preserving their medicinal potency. Field processing directly impacts the quality of your final product, so handle everything with clean hands or gloves to prevent contamination.
Start by gently brushing off any dirt, insects, or debris while you’re still at the harvest site. Don’t wash herbs in the field unless absolutely necessary, excess moisture encourages mold and degrades active compounds. If you must rinse nettle or yarrow, shake off water immediately and lay them on a clean cloth to air-dry before packing.
Sort your harvest as you go, removing damaged leaves, diseased plant material, and any non-target species that may have gotten mixed in. Keep different herbs separate in breathable containers like paper bags or woven baskets, never use plastic bags, which trap heat and moisture.
Temperature control matters. On warm days, keep your harvest basket in shade and get herbs home quickly. Direct sunlight and heat above 85°F begin breaking down volatile oils and other medicinal constituents within hours. If you’re hiking out, place delicate flowers and leaves between layers of breathable cloth to prevent crushing and overheating.
Transport everything home within four hours of cutting for best results.
Verification and Quality Assessment
Post-Harvest Identification Confirmation
Once you’re home with your harvest, conduct a final identification check before processing or consuming anything. This confirmation step catches mistakes that field conditions might have obscured.
Spread your harvest on a clean surface and compare samples against multiple field guides, not just one. Cross-reference at least three sources, paying close attention to photographs of dried specimens, which often look different from fresh plants. Regional guides specific to Oregon flora provide more reliable details than national publications.
Take high-resolution photos of your harvest from multiple angles: whole plant, leaf detail, stem cross-section, and any flowers or seeds. Post these to reputable plant identification forums or apps where experienced botanists can verify your finds. Be patient and wait for consensus before using the herbs.
If uncertainty persists, press and dry a sample following herbarium standards, then bring it to your county extension office, a local herbalist guild meeting, or a university botany department. Many institutions offer free plant identification services. Keep detailed notes about where and when you harvested, as this context helps experts confirm species.
When in doubt, don’t use it. Misidentification isn’t worth the risk, and every uncertain harvest becomes a learning opportunity for your next outing.
Next Steps: Drying, Processing, and Storage
Once you’ve verified your harvest, proper handling within the first few hours determines whether those wild herbs retain their medicinal compounds or turn into worthless plant matter.
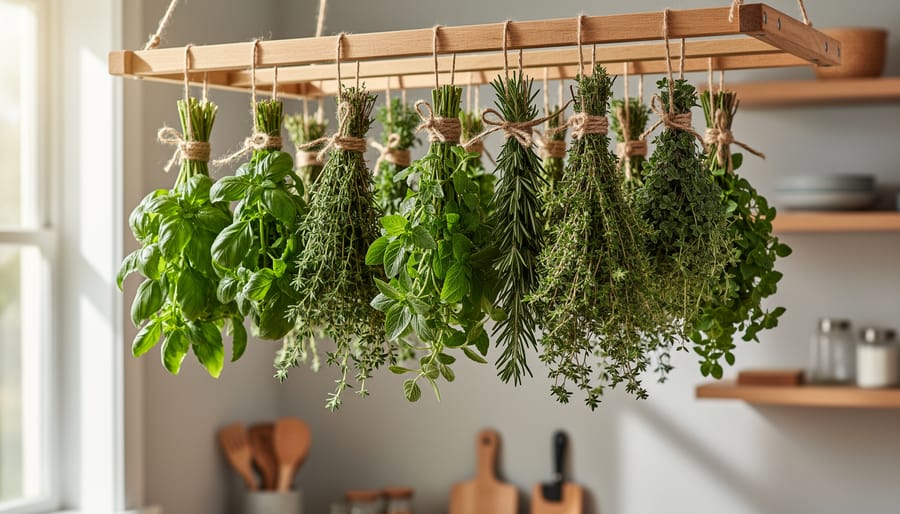
Fresh herbs contain 60-80% water content. Your primary goal is removing that moisture while preserving volatile oils and other active constituents. For aerial parts like leaves and flowers, bundle small handfuls with twine and hang them upside down in a dark, well-ventilated space. Air circulation is critical. A closet with a fan works better than a humid basement. Roots require washing to remove soil, then slicing into quarter-inch pieces before spreading on drying screens. Complete drying takes 7-14 days depending on plant density and humidity levels.
Temperature matters significantly. Heat above 95°F degrades many medicinal compounds. If you’re using a dehydrator, set it to the lowest setting. Your herbs are ready when stems snap cleanly rather than bending.
For tincture-making, you can skip drying entirely. Fresh plant tinctures capture different constituent profiles than dried herb preparations. Use high-proof alcohol (at least 80 proof vodka or 190 proof grain alcohol for resins) within 24 hours of harvest for maximum potency.
Store dried herbs in glass jars away from light and heat. Label everything with species name, plant part, harvest location, and date. Most dried herbs maintain potency for one year. After that, they’re better suited for tea than medicine.
Building Your Wildcrafting Knowledge
Wildcrafting mastery develops over years of observation, study, and hands-on experience. No single outing or course will teach you everything about Oregon’s botanical landscape, this is a lifelong practice that deepens with each season you spend in the field.
The strongest foundation comes from combining multiple learning approaches. Start with trusted field guides specific to Pacific Northwest flora, such as “Plants of the Pacific Northwest Coast” or “Medicinal Plants of the Pacific West.” Join local herb walks and identification workshops offered through botanical gardens, nature centers, and community colleges across Oregon. Consider enrolling in comprehensive herbalism programs that include wildcrafting modules, where experienced herbalists share both identification skills and ethical harvesting wisdom. Connect with local herbalist groups and foraging communities, these networks provide mentorship, seasonal plant walks, and accountability for sustainable practices.
Beyond formal education, cultivate your own observation practice. Visit the same wild areas repeatedly throughout the year to witness how plants change through their growth cycles. Document your findings with photos, sketches, and notes. If you’re new to working with herbs entirely, you might start a herb garden at home with some of the same species you encounter in the wild, this controlled environment lets you study plant characteristics up close before venturing into more challenging identification scenarios.
Build relationships with experienced wildcrafters who can share site-specific knowledge and verify your identifications. The safest path to confident wildcrafting runs through community, not isolation.
Frequently Asked Questions About Oregon Wild Herb Harvesting
Do I need a permit to harvest wild herbs in Oregon?
It depends on where you’re harvesting and whether it’s for personal or commercial use. National Forests and BLM lands typically allow personal harvest of small quantities without a permit, but commercial harvesting requires a special forest products permit. State parks generally prohibit all plant harvesting.
Which herbs are easiest for beginners to identify and harvest in Oregon?
Red clover, yarrow, and nettles are excellent starter herbs because they have distinctive features and few dangerous look-alikes. Oregon grape is also beginner-friendly with its holly-like leaves and bright yellow flowers, making misidentification unlikely.
How much can I safely harvest from a wild population?
The honorable harvest guideline recommends taking no more than 10-20% of any plant population, and only when at least 20 healthy plants are present. If you’re the only harvester you see, take from the lower end of that range to ensure the population thrives.
What’s the best time of year to start wildcrafting in Oregon?
Late spring through early summer offers the most abundant harvesting opportunities for leaves and flowers, which are ideal for beginners learning identification. Start in May or June when plants are in bloom, making identification easier and giving you access to many common medicinal herbs.
Beyond these common questions, new wildcrafters often wonder about the relationship between harvested plants and natural remedies they’ve read about. Understanding that wildcrafting is the first step in creating your own herbal preparations helps contextualize why proper identification and harvesting techniques matter so much, the quality of your remedy depends entirely on correctly identifying and carefully handling the plant material.
When evaluating harvest locations, prioritize areas at least 100 feet from roads or agricultural operations to avoid contamination from vehicle emissions or pesticides. Look for robust, healthy plant populations in areas with minimal human disturbance. If you’re uncertain about a plant’s identity even after consulting multiple field guides, photograph it from several angles and seek confirmation from experienced herbalists or local wildcrafting groups before harvesting. Oregon has active foraging communities and native plant societies that welcome beginners and offer identification assistance, making it easier to build confidence in your harvesting decisions.
Wildcrafting in Oregon connects you to an unbroken chain of herbalists who have walked these forests, meadows, and coastal headlands for generations. When you harvest nettles along a stream bank or gather yarrow from a mountain trail, you’re not just collecting plants, you’re entering into relationship with the land that sustains them.
Start with one or two easily identified herbs this season. Visit the same patch throughout the year and watch how it changes. Notice what grows nearby, when flowers appear, how the ecosystem functions as a whole. This patient observation builds the foundation for a lifetime of learning.
Sustainable wildcrafting isn’t a set of rules to memorize; it’s a practice that deepens with experience. Each harvest teaches you something new about plant cycles, habitat requirements, or your own relationship with the natural world. The knowledge you gain transforms simple foraging into an exchange, one where you give attention, respect, and restraint in return for medicine.
Oregon’s wild places offer abundant opportunities to learn this ancient craft. The path forward is clear: educate yourself thoroughly, harvest responsibly, and let each experience inform the next. Your journey as an herbalist begins with that first mindful harvest.


